
How to Paint a Room Yourself: Complete DIY Painting Guide for Indian Homes (2026)
Decorating your very own room may seem challenging at first, but when you have the correct steps and tools to do so, it ends up being one of the best do-it-yourself projects. Be it redecorating your bedroom in Gurugram or decorating your living room in Noida, or even your rented accommodation in Delhi NCR, you can give your room an entire makeover for just a few thousand rupees less than labor charges.
Many home owners think that a good-looking wall requires hiring professionals. However, the quality of the painting is not determined by costly equipment but rather by how well the surface is prepared before painting. The main factor that distinguishes between luxurious-looking walls and uneven walls is the way the surface was prepared for painting.
This comprehensive DIY guide on painting rooms in India covers all the steps involved, from preparing the surfaces to priming and painting them, just like an expert would.
Why DIY Room Painting Is Popular in India
During recent times, there have been many people in India who have opted for DIY painting works due to the simplicity of paints available in modern times and affordable prices of the equipment required. For instance, a normal bedroom can be painted within a weekend, and the cost of labour involved would be almost halved.
DIY painting offers you full authority over:
- Choice of colors
- Quality of finish
- Duration
- Cost
- Customization
For small-sized rooms and straightforward repainting tasks, DIY painting is always an option.
Nevertheless, this is only possible if the proper procedures are followed sequentially.
Tools & Materials Required for Your DIY Paint Room
Before you start on your DIY wall painting task, ensure that all the needed tools and materials are ready because going back to shop halfway through the job can cause paint inconsistency.
Required Tools for Painting Wall
- Paint roller with tray
- Angled paintbrush (2 inches wide)
- Extension handle for paint roller
- Painter’s tape
- Plastic sheet or drop cloths
- Sandpapers (80 grit and 120 grit)
- Putty knife
- Sponge and cloth
- Interior wall primer
- Emulsion paint
- Wall putty (acrylic or cement-based)
- Water bucket
- Stir sticks
Quality rollers and paint brushes do matter a lot when it comes to painting.
Step 1: Preparation and Protection of the Room
One of the most crucial steps in painting is preparation.
Begin by relocating all furniture into the middle of the room and wrapping it in plastic sheets. You should also remove wall hangings, switches, curtains, and electrical outlets.
Use painter’s tape on:
- Window corners
- Doors
- Ceiling corners
- Skirting
- Wall switches
Place drop cloths or newspapers on the floor since dripping is always inevitable.
Ventilation is equally important. Ensure windows are open for fresh air circulation, but keep away from windy conditions that might interfere with your paint drying process.
Pro Tip
Firmly press the painter’s tape using a putty knife to minimize paint bleeding through its edges.
Step 2: Cleaning Walls
The first step that people tend to omit is wall cleaning, which happens to be one of the most common reasons for paint peel off.
Indian houses get dusty easily, and the kitchens' walls contain invisible grease layer due to which paint cannot adhere to the surface.
Walls Cleaning for Painting
- Add a small quantity of detergent to hot water
- Clean all walls with a sponge
- Scrub away any grease stains with vinegar or a degreasing agent
- Treat any mould or black spots before painting
- Let the walls dry for 24 hours
Avoid painting over any mould as it will lead to the deterioration of paint after some time, especially during the monsoon season in Delhi-NCR region.
Step 3: Applying Wall Putty Before Painting
The application of wall putty prior to painting is the procedure by which perfectly smooth and professional-looking walls are created.
The majority of walls in India have small cracks, pores, and other inconsistencies. These are all removed by applying putty, resulting in a smooth base for the paint.
Failure to use wall putty properly will mean that the most expensive paint looks poor.
Types of Wall Putty
1. Cement-based putty
Best for:
- New plaster
- Outdoor walls
- Water-resistant walls
Common types include Birla White and JK Wall Care Putty.
2. Acrylic wall putty
Best for:
- Interior walls
- Repaints
- Smooth walls
Acrylic putty dries faster and sands more easily.
Steps Involved in Putting Wall Putty on
- Clean the walls properly
- Mix the wall putty thoroughly to a proper thickness
- Apply a light coat of wall putty with a wide knife
- Allow the putty to dry completely
- Sand the wall surface gently with 120-grit sandpaper
- Add another coat if necessary
- Repeat sanding till you get a smooth finish
Skilled painters usually take help of a torch inclined at an angle to detect any bumps on the wall.
It is amazing how easily you can find out flaws with this technique.
Step 4: Smoothing Out the Walls by Sanding
It is the act of sanding that makes the walls extremely smooth.
After applying putty to the walls, minor imperfections like tiny ridges may still be visible on the wall surface. Sanding helps eliminate such imperfections and create a smooth surface for the primer.
Sand the Walls Properly
- For minor imperfections, use an 80-grit sandpaper
- Use 120-grit sandpaper to sand the entire wall
- Sand in a circular motion
- Clean the walls thoroughly using a wet cloth
Failure to clean the walls after sanding will make your paint rough.
Step 5: Primer Application
The use of primer is important for efficient paint adhesion and uniformity of colour.
Untreated surfaces tend to absorb paint poorly, resulting in patches if no primer is used.
Advantages of Primer
- It protects against porous walls
- Helps paint to adhere better
- Increases the depth of the paint
- Prevents stains from becoming visible
- Reduces amount of paint required
Which Primer to Use?
Acrylic interior primer is best for most interior walls in India.
In case of stains or nicotine marks on walls, start with a stain-resistant primer.
- To apply the primer,
- Use roller to cover larger surfaces
Use brush on the edges and corners.
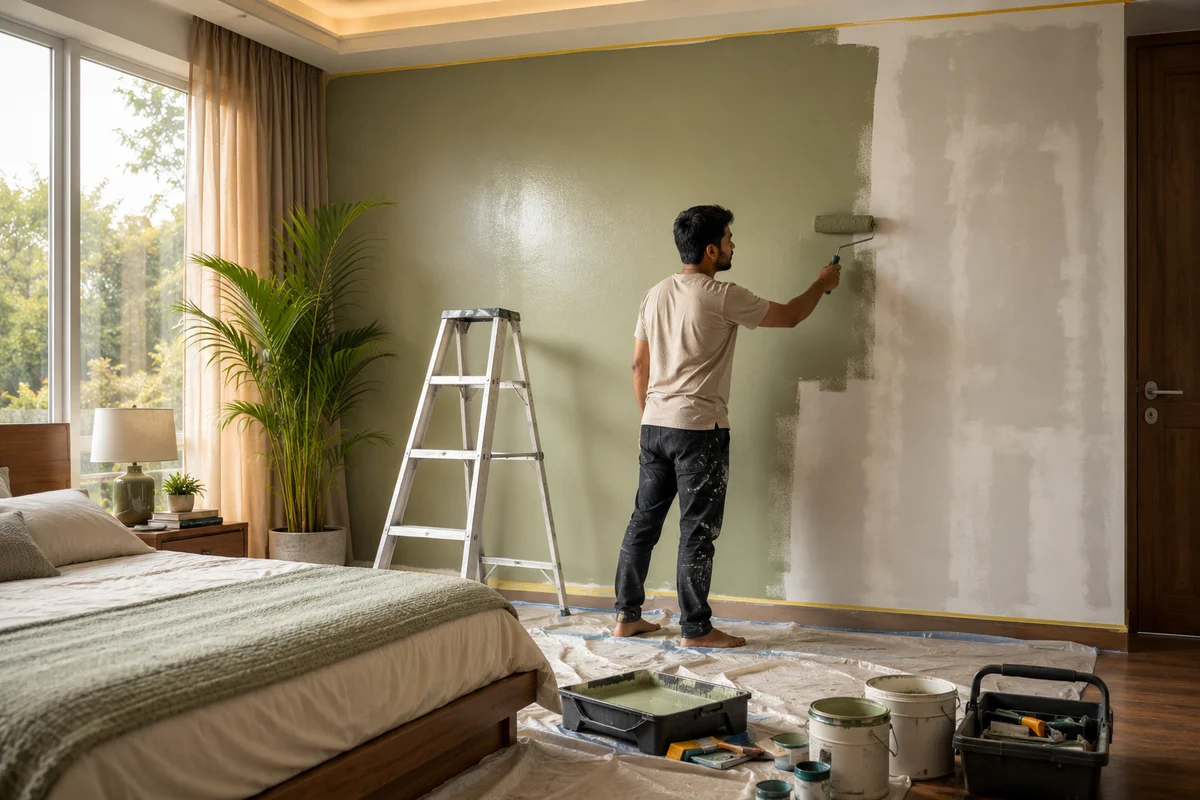
Step 6: Painting the Walls
Here is where all the work pays off - painting time!
Technique is just as important as quality paint.
The First Part Is to Cut-In
"Cut-in" is when you paint the edges using a brush first.
Areas for painting:
- Ceiling
- Corners
- Doors
- Windows
- Switchboards
You will have a sharp line.
Rolling the Large Areas
After cutting-in, roll the main wall areas.
The Proper Way to Roll
- Begin at the top of the wall.
- Move in a “W” or “M” stroke.
- Use vertical strokes to fill in gaps.
- Keep the paint “wet.”
- Work in sections.
“Wet edges” mean overlapping your roller strokes while the paint is still wet.
It’s a mistake that new painters make when rolling a section of wall and coming back to finish later after the paint has dried.
This leaves an obvious line.
Step 7: Paint the Second Coat
For most rooms, we have:
- 1 coat of primer
- 2 coats of paint
The second coat will help us get:
- Deeper color
- Finer finish
- Even coverage
Make sure that the first coat is dried before painting the second one.
In humid Indian weather conditions, drying takes more time than usual.
Before you paint the second coat:
- Look for any drips or rough patches.
- Sand the surface lightly if necessary.
- Clean dust off the surface.
Follow the same procedure again as before.
It requires patience at this point.
Step 8: Finishing and Cleaning Up
The finishing touches distinguish amateur painting from professional painting.
Last Steps
- Remove painter’s tape while paint is still tacky
- Remove tape slowly at an angle of 45 degrees
- Fix any oversights instantly
- Clean brushes and rollers right away
- Ensure proper ventilation
Make sure to store the excess paint properly for any future repairs.
One good technique would be putting plastic sheeting directly over the paint surface before sealing it.
This will protect the paint from air and ensure that it can be reused later.
Beginner Interior Painting Tips
Some tips worth following by beginners include:
Test Paint Colors
Always test the color paint first before choosing one to use.
Different lighting makes colors look different in Indian households.
Paint from Top to Bottom
Commence your painting from the top section of the ceiling.
Keep Mixing Paint
The pigmentation settles at the bottom of the bucket.
Avoid Excessive Heat
Do not paint during the summer months when temperatures are high.
This leads to quick drying and roller marks.
Get Additional Paints
The paint absorption capacity of Indian plastered walls is high.
It is good to have an additional 10 percent of paint.
Final Thoughts
It is entirely possible to paint your own room, even if you are an amateur.
The key to a pro-level job is not fancy tools; it is preparation, patience, and technique.
If you concentrate on:
- Cleaning the wall
- Applying wall putty correctly
- Sandpapering the wall
- Using the right amount of primer
- Applying the paint
you will end up with a beautiful surface.
Do-it-yourself room painting is one of the best things you can do to enhance your space, improve your abilities, and save money.